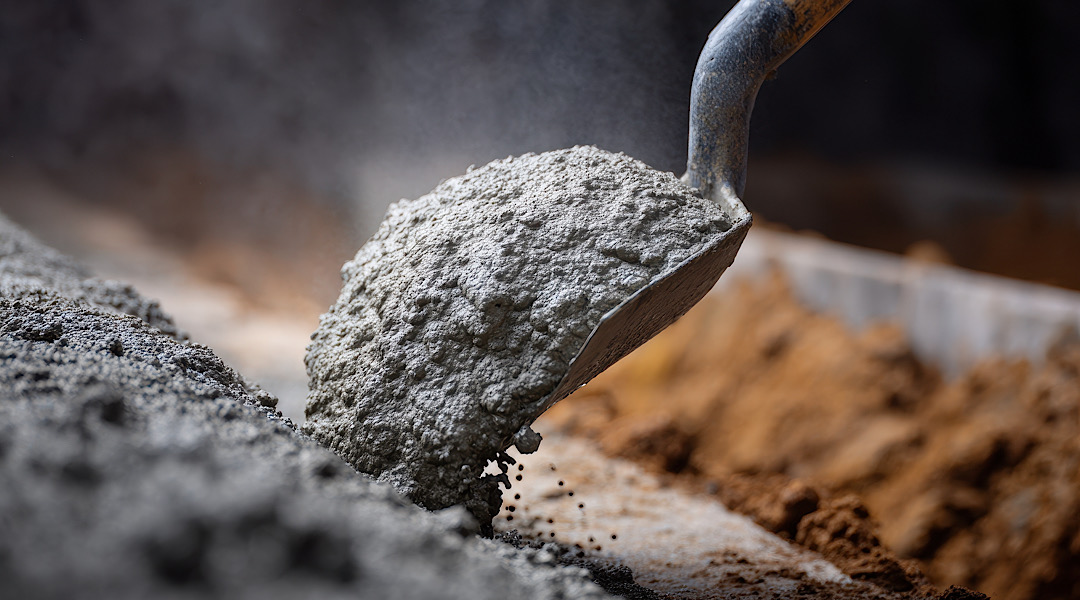
What to Do Before the Crew Arrives (And What Most Homeowners Skip)
You’ve noticed the sunken driveway slab, the tilted sidewalk panel, or the patio section that’s become a tripping hazard. You’ve scheduled your concrete lifting appointment. Now what? Most homeowners assume the job is entirely hands-off — just open the gate and let the professionals handle it. And while polyurethane concrete lifting is genuinely one of the least disruptive repair processes out there, a little preparation on your end can mean the difference between a smooth two-hour job and a day full of delays, complications, and unexpected costs.
This guide walks you through exactly what to do — and just as importantly, what not to do — before the team from Idaho Falls, ID Concrete Lifting & Leveling shows up at your door. Whether you’re dealing with a sunken garage floor, a settled front walkway, or a pool deck that’s become a liability, these steps apply across the board.
Start With a Clear-Eyed Walk-Around of the Problem Areas
Twenty-four hours before your appointment, walk every inch of the concrete that’s being serviced. You’re not a concrete expert, but you are the person who knows your property best. Look for things that might not have been obvious when you scheduled the job:
- Are there additional problem areas you haven’t mentioned to the crew? A section that’s only sunk a quarter inch now could become worse if the surrounding soil is compromised.
- Are there cracks that run through the slab rather than just along the edges? Wide, diagonal, or stair-step cracks can indicate structural issues that go beyond simple settlement.
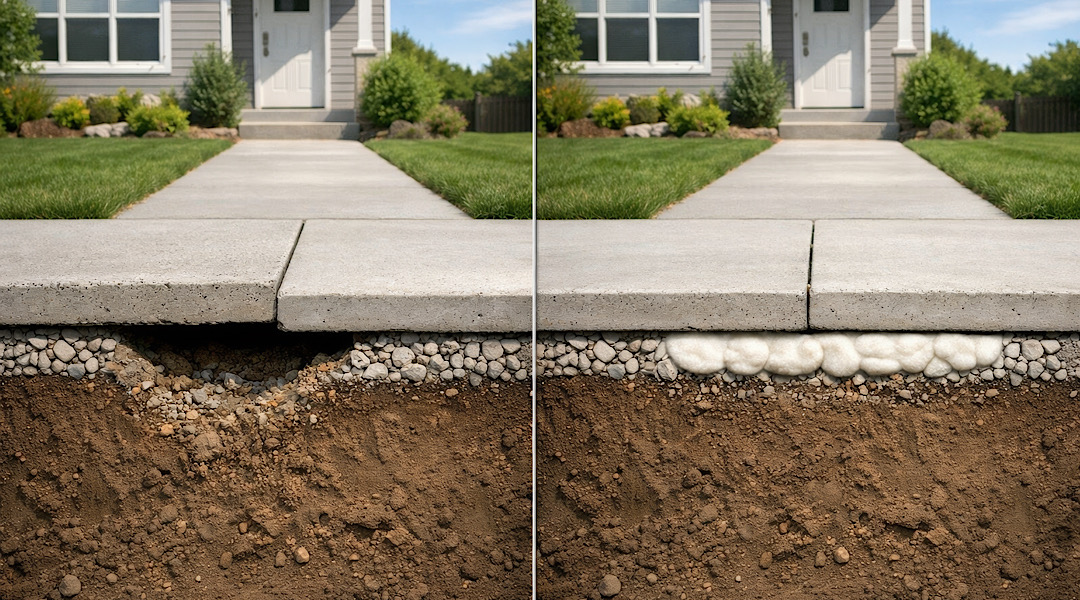
- Is there any standing water near the slab? This might point to a drainage problem that needs addressing — something worth flagging to your technician, since poor drainage is one of the primary reasons concrete sinks in the first place. (If you’re curious about the root causes, our post on what causes concrete to sink around your home is worth reading.)
Take a few photos as you walk. Not because you’re building a legal case, but because it helps you communicate clearly with the technician about what you’ve observed over time. “This corner has dropped about an inch since last spring” is a lot more useful than “it looks kind of off.”
Clear the Area — More Thoroughly Than You Think You Need To
Here’s where most homeowners underestimate the prep work. The equipment used in polyurethane foam lifting is compact compared to mudjacking rigs, but the crew still needs working room — and they need access to the underside of the slab through drilled ports, which means nothing can be blocking the surface or the perimeter.
For driveways and garage areas:
- Move all vehicles — even if they’re parked 10 feet away, the injection equipment hoses and power lines need clear pathways
- Remove any portable basketball hoops, trash cans, bikes, or equipment stored along the garage walls near the floor
- If you have floor mats, tool chests on wheels, or workshop equipment near the garage floor edge, roll them back at least six feet
For patios and walkways:
- Remove all furniture, planters, grills, and decorative items from the surface and the surrounding area
- Take up any outdoor rugs — even if they’re not on the slab being lifted, adhesive-backed mats can be a tripping hazard when hoses are running across the yard
- Move potted plants, especially heavy ones, away from the work zone
For pool decks:
- Remove all pool furniture, umbrellas, and accessories from the deck surface
- If you have a pool cover, make sure it’s fully retracted or secured so it doesn’t interfere with the work area
- Note the location of any in-deck drains or electrical conduit so you can point them out to the technician
Know Where Your Utilities Run
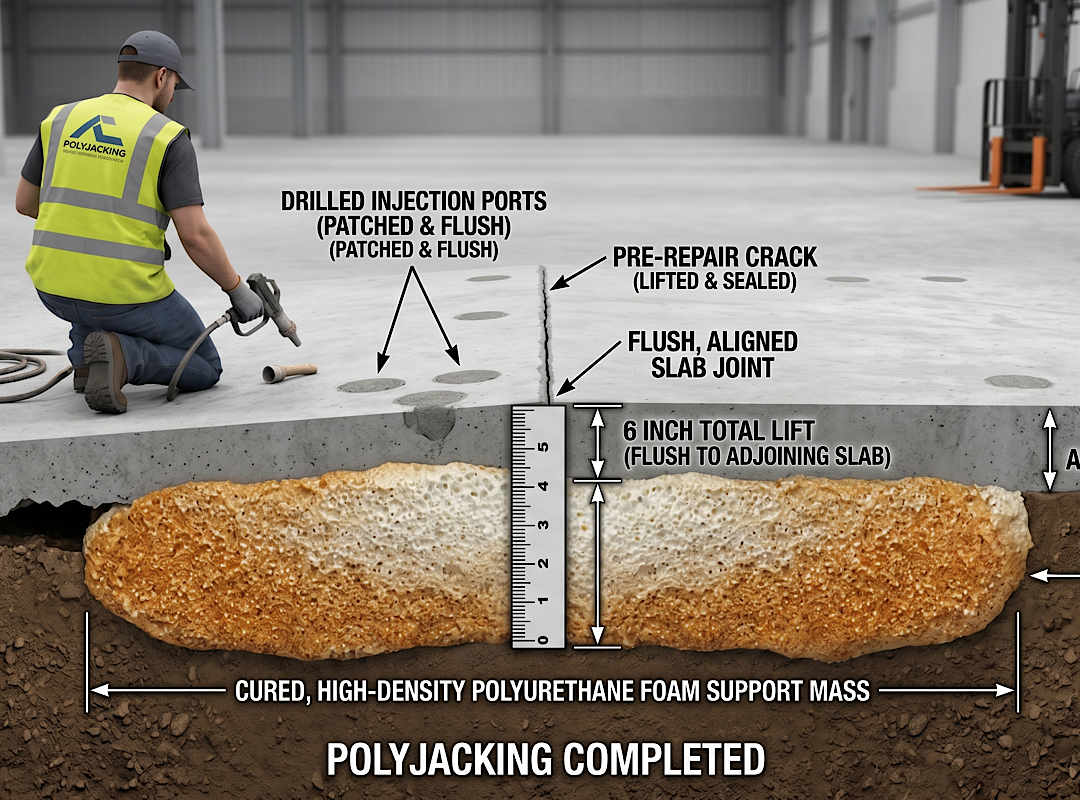
This is the step that feels optional but genuinely isn’t. Polyurethane concrete lifting involves drilling small holes — typically about 5/8 inch in diameter — through the slab to inject foam beneath it. In most cases, a trained technician knows exactly where to drill based on the slab’s layout and the settlement pattern. But if you have utility lines, irrigation conduit, or in-slab radiant heating running beneath that concrete, it needs to be communicated clearly before any drilling begins.
Before your appointment:
- Call 811 (the national “Call Before You Dig” number) at least three business days in advance — this is legally required in most states and gets your underground utilities marked at no cost
- Tell the technician about any in-slab radiant heating, especially in garage floors or basement floors
- If you have drip irrigation systems that run under concrete walkways, flag or mark where those lines enter and exit the slab
- Mention any buried drainage pipes or French drains near the work area
A good technician will ask about all of this during the appointment, but giving them a heads-up when you confirm the job — or first thing when they arrive — sets everyone up for success.
Plan for Pets, Kids, and Foot Traffic
Polyurethane foam cures incredibly fast — most residential lifting jobs are complete within a few hours, and the concrete can typically handle foot traffic within 15 minutes of the final injection. That’s one of the biggest advantages of this method over traditional mudjacking. But during the work itself, you need the area clear of people and animals for safety reasons: there are power tools, pressurized hoses, and freshly drilled holes in the slab that present real hazards.
Set up a simple plan before the crew arrives:
- Arrange for pets to be inside or in a separate fenced area away from the work zone — even the friendliest dog can become anxious around power equipment
- Let your kids know the backyard (or driveway, or wherever the work is happening) is off-limits for the morning
- If neighbors regularly cut through your property or walk their dogs along your sidewalk, consider posting a temporary sign the day before
What to Expect When the Crew Arrives
Understanding the process helps you stay out of the way in the right ways and ask smart questions at the right times. The technician will typically begin with a thorough assessment of the slabs being lifted — they may probe around the edges, tap the concrete to check for voids, and confirm the areas flagged in your original quote. This is a great moment to mention anything new you noticed during your walk-around.
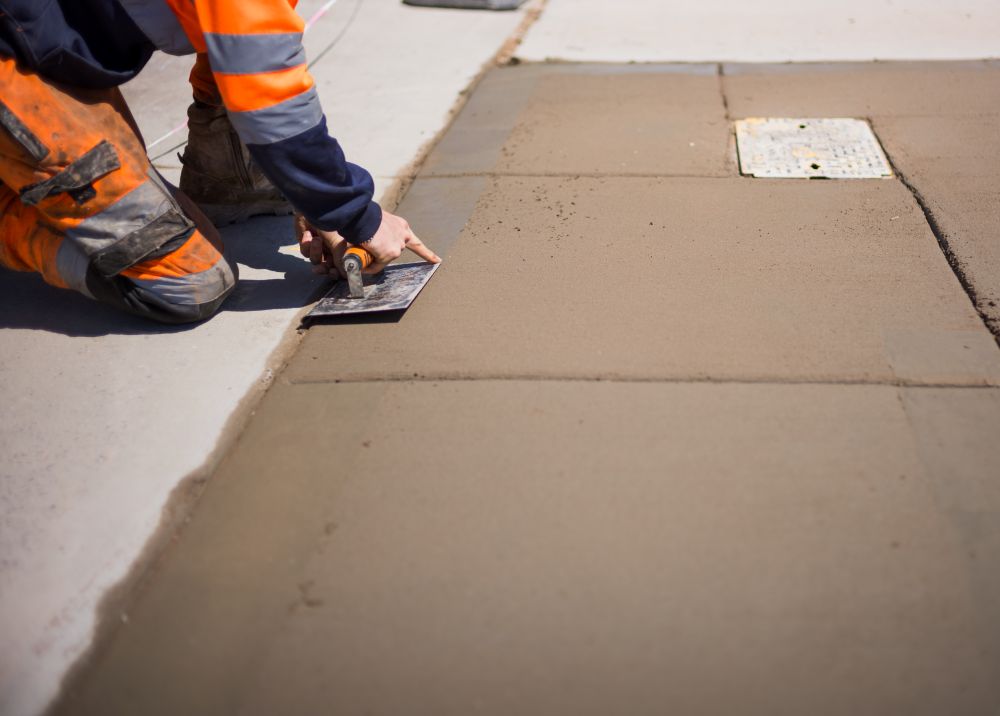
From there, they’ll map out the injection points — usually every 4 to 6 feet across the slab, though the pattern varies based on the slab size and where the settlement is concentrated. Holes are drilled, foam is injected in measured bursts, and the technician monitors the slab as it lifts. It’s a surprisingly controlled process; the foam expands gradually, and an experienced technician adjusts their injection amounts to avoid over-lifting. (If you want to understand the mechanics in more detail, our post on how polyurethane concrete lifting works breaks it down step by step.)
Once lifting is complete, the drilled holes are patched with cement grout, and the area is cleaned up. Most residential jobs leave behind almost no mess — no slurry pumped across the yard, no heavy equipment tracks in the grass.
Have Honest Answers Ready for These Questions
A good technician will ask you questions that help them do their job better. Think through your answers ahead of time:
- How long has this been sinking? Recent settlement (last 6–12 months) often means the underlying soil is still shifting. Long-standing settlement (several years) usually means the soil has stabilized and lifting will be more permanent.
- Have you noticed any water pooling or drainage issues near this area? This is critical information because lifting the slab changes its slope, and if drainage is already a problem, the technician needs to factor that into how the slab is repositioned.
- Has anyone worked on this concrete before? Previous repair attempts — especially prior mudjacking — can affect how the foam behaves and where injection ports need to be placed.
- Are there any sections where you’ve noticed the slab moving seasonally? This can indicate frost heave rather than settlement, which is a different problem with different solutions.
After the Job: The First 24 Hours Matter
You can walk on lifted concrete almost immediately, and cars can typically drive on a lifted driveway within an hour or two. But there are a few things to keep in mind in the first 24 hours:
- Avoid placing extremely heavy, concentrated loads (like a loaded dumpster or heavy construction equipment) on the lifted slab for at least 24 hours — the foam achieves its final cure and maximum strength over the first day
- Check the patched holes after the grout dries — if any patches look significantly sunken or cracked after 24 hours, flag it to the company
- Take a few “after” photos at the same angles as your “before” photos — this is useful documentation if you ever need to make an insurance claim or sell the home
- Monitor the area for a week or two, particularly after any rain — if you notice re-settling, contact the company promptly rather than waiting
Is Your Concrete Actually a Good Candidate for Lifting?
Preparation also means making sure you’re not spending money on the wrong fix. Concrete lifting works beautifully when the slab itself is structurally sound but has settled due to soil movement beneath it. It’s not the right solution when the concrete is severely cracked and broken into multiple pieces, when the underlying issue is an ongoing plumbing leak, or when the slab has deteriorated to the point where it’s crumbling from freeze-thaw damage.
If you’re not sure whether your concrete is a good candidate, our posts on signs your concrete needs lifting and whether uneven concrete is a safety hazard can help you make that call with more confidence. And if cost is a factor in your decision — it always is — our breakdown of concrete lifting costs in Eastern Idaho gives you realistic numbers to work with.
You can also browse our Our Work gallery to see the kinds of results that are possible on properties similar to yours — sometimes seeing a before-and-after from a project in your region is the most useful benchmark of all.
The Bottom Line
Preparing for a concrete lifting appointment isn’t complicated, but it does require some intentional effort the day before the crew arrives. Clear the work area fully, know where your utilities run, think through your answers to common questions, and plan for pets and foot traffic to be out of the way. Do those things, and you’ve done your part to make the job go efficiently.
The rest — the assessment, the drilling, the foam injection, the cleanup — is what a trained polyurethane lifting technician does dozens of times a week. Your job is to set them up to do it well. A bit of preparation turns a good concrete lifting job into a great one.
Have questions before your appointment? Check out our full resource library on the Blog, or reach out directly — we’re always happy to walk you through what to expect for your specific situation.